WordPress Booking Calendar
You can easily embed an online booking calendar into your WordPress website. Clients can then book appointments and pay an up-front payment directly within your site.
- Sign in to your WordPress Admin panel
-
Go to Pages > All Pages in the left menu or choose Add New. Click to edit the page where you'd like to place your booking calendar.

-
You should now see the edit screen. If you created a new page, give it a title.

-
In a new browser window, log in to your Bookedin account. Go to Settings > Integrate in the top menu. Under the Website booking calendar, you'll see a preview with some options.
- First, choose a Font: Proxima Nova, Arial, Verdana, Tahoma, Georgia, Times
- Now choose a Theme: Match Device, Light, Dark
- Then select the Accent Color from the predefined color selection (If you select the Custom color picker, you can either click on the color pad or use the custom bar color or enter a HEX value), then click Choose.
- When you're happy with your settings, hit Get Code. You'll see 2 separate boxes with code. Follow the instructions to paste each piece of code into your website:
-
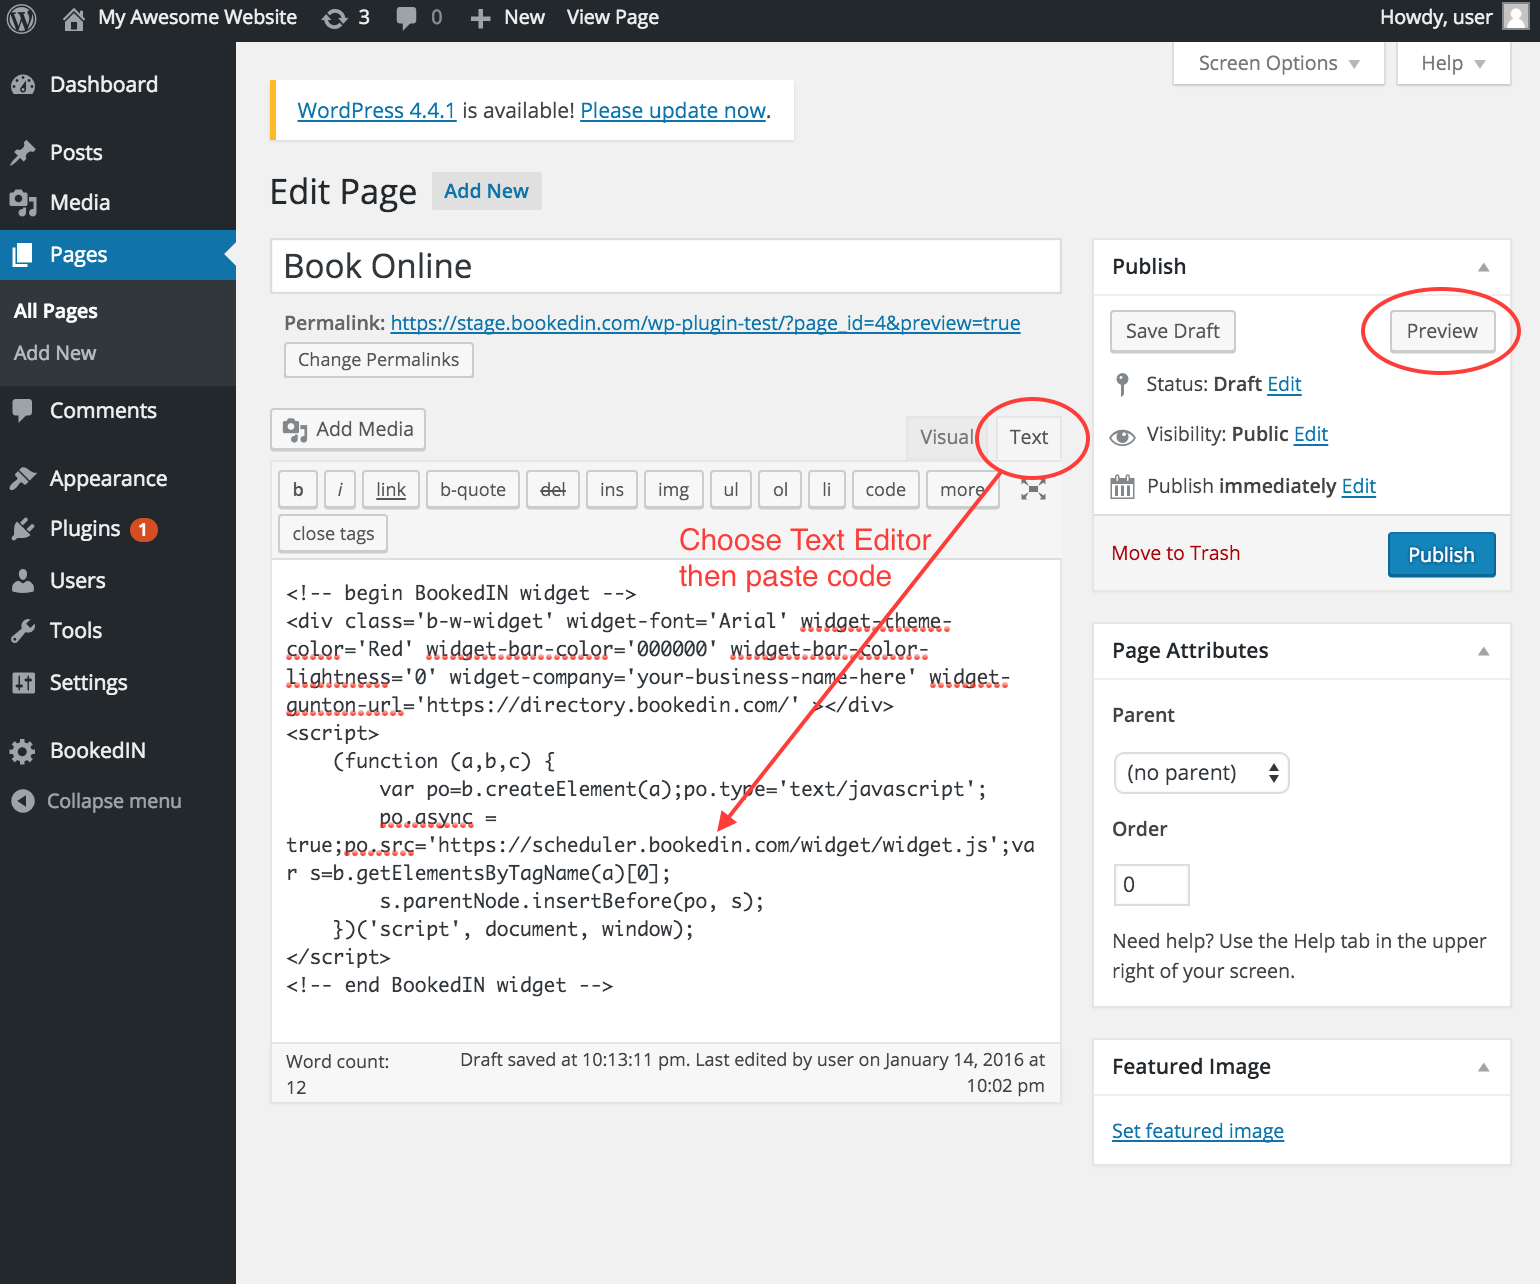
Now switch back to your WordPress Admin window. In the page editor, choose the Text editing view, then paste the code that you copied from Bookedin, then hit preview.
- Preview your booking calendar. Looking great! Now go back to your WordPress admin window, and hit Publish.
- Ta-da! Your fancy new booking button is live. Check it out on your site to make sure it is functioning properly. Here is a sample of what it looks like on a basic WordPress template. The calendar is fully responsive, so will look great on desktop computers, or any mobile device.

-
Bonus step: Paste the booking website booking calendar code into a blog post or page! You can paste the button code anywhere on your WordPress site, but please note, the website booking calendar's design will only appear properly once published.
Comments