WordPress Booking Button
If you have a WordPress website, you can easily add an appointment booking button to help you get more clients in the door. (Click here to learn how to embed your full calendar)
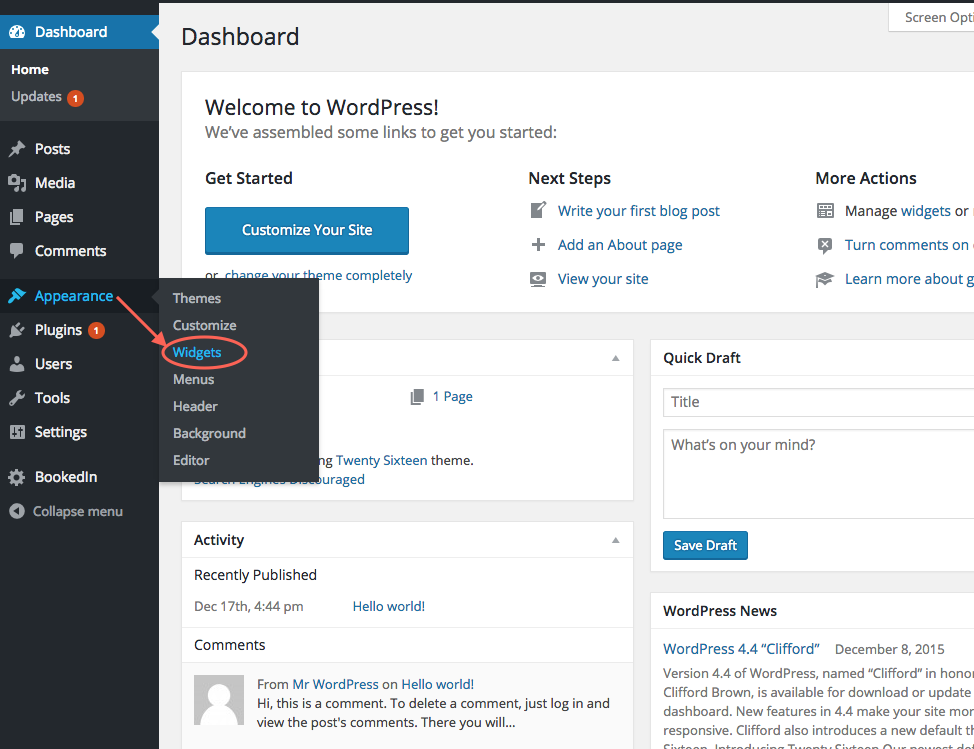
- Log in to your WordPress Admin panel
-
Go to Appearance > Widgets
-
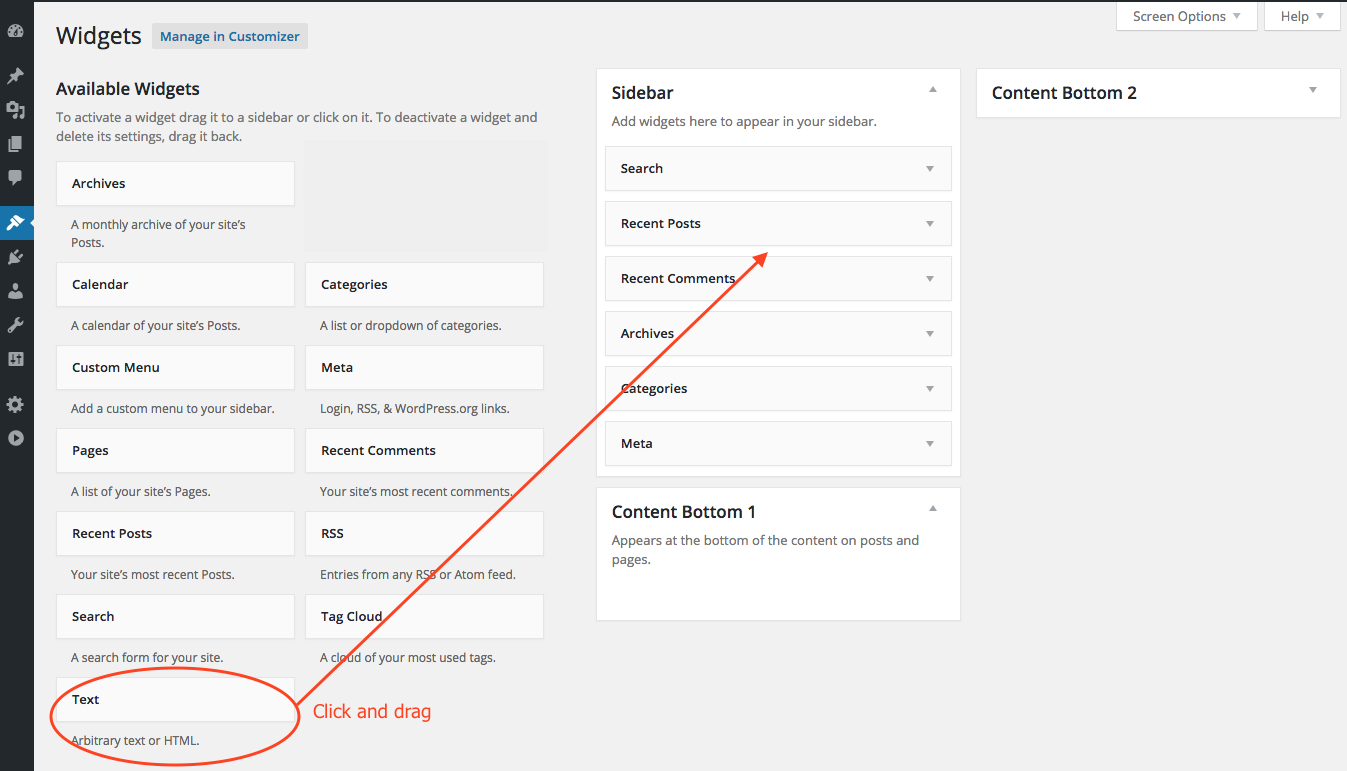
Find the Text widget, then click and drag it into the widget area where you would like your booking button to appear.
- Now in a new browser window, log in to your Bookedin account
-
Go to Settings > Integrate (top menu)
- Under Website Button you'll see some options.
- Choose a button size: Standard or Small
- Choose a button color: Orange, Red, Blue, Green or Custom. If you choose custom, use the color-picker or enter a HEX value
- When you're happy with the look of your button, hit Get Code. Then you'll see 2 separate boxes with code. Follow the instructions to paste each piece of code into your website.
-
Now switch back to your WordPress Admin window. In the text widget you just created, paste both pieces of code that you copied from Bookedin. Type in a title for the widget (ex. Book Online), then hit save.
-
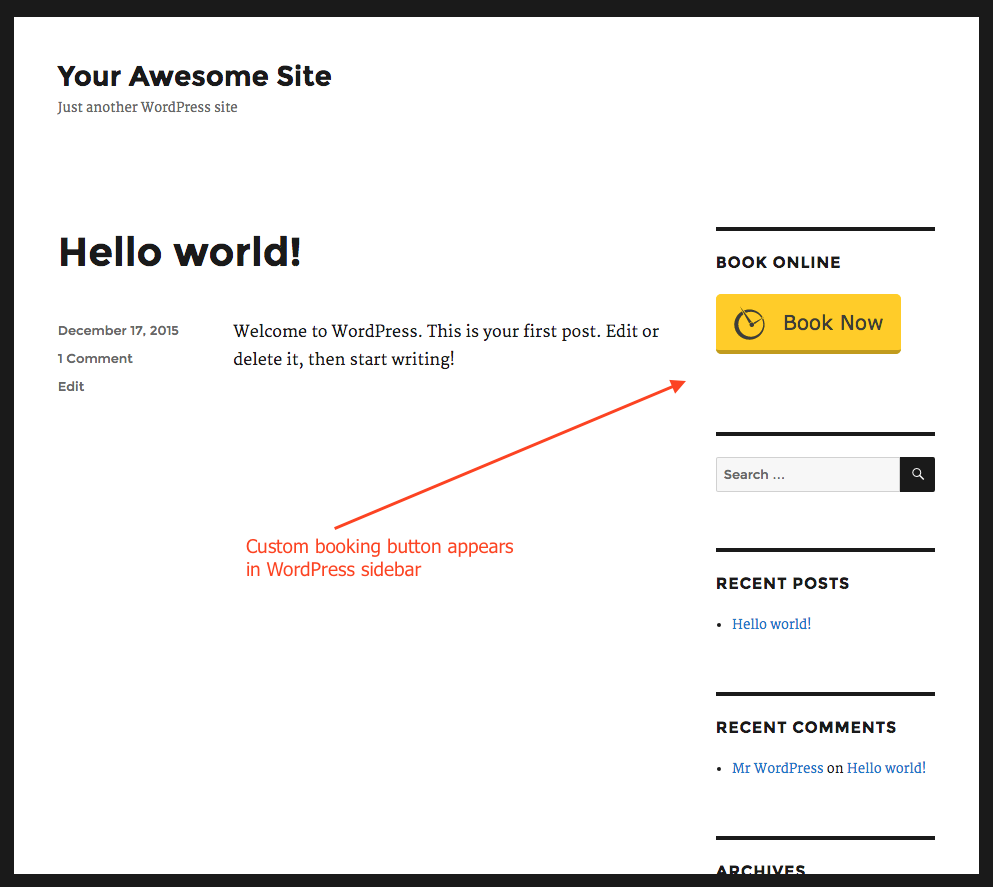
Ta-da! Your fancy new booking button is live. Check it out on your site to make sure it is functioning properly.
-
Bonus step: Paste the button code into a blog post or page! You can paste the button code anywhere on your WordPress site, but please note, the button design will only appear properly once published.
Edit view:
Published view:
Comments